Showing posts with label baking. Show all posts

Wednesday, December 16, 2015

Food Blogger Cookie Swap 2015

The Great Food Blogger Cookie Swap is back again this year. I always have such a great time researching, planning, and making my treat for this exchange. I always find a million recipes and have a hard time slimming it down to the perfect one to send out. Here's what I did last year, the year before and even the year before that!
fbcookieswap.com

This year I decided on S'mores Cookies from the Chocolate Moosey blog. I did alter the recipe slightly because after the first batch of dipping the cookies in chocolate, I realized they wouldn't be ideal to ship that way. So I modified and put the chocolate on the inside. 

I gathered all the ingredients and my mom's spritz cookie press. I have never used the press on my 
own, so this was going to be a fun experience. 
The dough came together really easily and luckily I had my food processor to make graham cracker crumbs. (Two sheets of graham cracker = 1/2 cup of crumbs almost exact!)


I then found the perfect tip to use for the Spritz and filled up the press with dough.

I then needed to do some testing to find out how much dough to press out to make the perfect sized cookies. My first batches ended up a little large and clunky, so I used less dough on the subsequent batches.


After letting the cookies cool completely, it was time to pair them up and get them ready for the fillings. You want to make sure you pair up cookies of almost the exact same size so when they sandwich together, everything is even.

And these silicone liners worked wonderfully for the cookies. Not a single thing stuck to the pan!
I filled one pan with cookies and topped them with one mini marshmallow each. Those went under the broiler and were watched closely for the toasting to happen. This was about 2 minutes max.
The other tray of cookies were spread with a thin layer of melted chocolate. Once the marshmallow is toasted, immediately sandwich the cookies so the fillings don't get too cooled. You want the marshmallow to smoosh and ooze and stick to the chocolate.

Don't mind the quality of the pans in this picture - this was just used for broiling. But watch the gooey, toasted marshmallow smoosh out when the top cookie is pressed in place.
And the voila, they are complete. I wrapped them up in groups of six per bag and tied them off with fun holiday ribbon.
Then it was time to wrap up the cookies securely with lots of tissue and newspaper for padding and send them to my fellow bloggers.
Of course you have to have a taste tester and my guy was a very willing participant. He loved them. The graham cracker cookie was delicious and he didn't want me to ship them all out!

In return for my cookies, I received treats from three bloggers - salted caramel cashew cookies that were divine from Stetted.
Ginger and Lime cookies from Hot Dinner, Happy Home that were the most unique cookie my guy and I have even eaten. I would have never thought that flavor would have worked and it really did.
Hall Nesting sent me Peanut & Cookie Butter Chocolate Chip cookies that were very large, thick cookie - made perfect for sharing. I could definitely taste the cookie butter.

I love this exchange and look forward to it every year! Here's how it works - you need to be an active blogger that writes about food throughout the year. You sign up and a few weeks later are given the names, addresses, and websites of three fellow bloggers. In return, your name, address, and website is provided to three other bloggers. Then you bake your treats, package them, and ship them out. The hardest part is waiting patiently for your three treats to come in the mail and find out what they are. 

Saturday, October 17, 2015

Fall Apple Crisp

My favorite month of the entire year is October, and maybe that's because it starts out with my birthday and ends with Halloween! I also love the leaves changing color, cooler temps, and pumpkin/apple flavored everything.

At my job, we bring in a treat on our birthday to share with the team. I decided to make an apple crisp, a favorite treat of mine and perfect for the fall weather. My dad used to make an amazing apple crisp with wheat germ. It was my brothers and my favorite breakfast. I couldn't find that recipe and i didn't have any wheat germ in the house, so I went on a search for other options.

I had plenty of apples in my house and found a recipe to use as a template before having some fun on my own with the flavors.  I really wanted it to taste like you are eating fall (haha)

I started by doubling the recipe so I would have enough to feed everyone at work (and have a few leftovers for myself to enjoy).


My Aunt bought me this awesome apple cutter a few years ago for Christmas. It cuts in either 8 or 16 pieces. I realized that by using the 16 piece option, I didn't need to really slice the apples any thinner and just had to remove the peel from each piece. I love time savers in the kitchen.

Here are my alterations to the recipe: (remember I doubled it)

Filling edits:
- I used 9 apples - I like a lot of apples in my crisp!
- I used 5 Tbsp. butter instead of 6 (trying to cut back on fat)
- replaced the vanilla with Maple Syrup as I didn't have any vanilla at home
- 1/2 tsp cinnamon and 1/2 tsp. pumpkin pie spice
- 2 Tbsp Flour and 2 Tbsp. Chai Protein Powder

Topping edits: 
- I used 3/4 cup of flour and 1/4 cup of Chai protein powder in the crumb topping
- I used 1/4 tsp cinnamon and a 1/4 tsp. pumpkin pie spice
- I used only 8 tbsp of butter for the topping (tried to but back a bit)

And after those edits, I followed all the mixing ingredients to a T. Even with less butter in the filling and more apples, I felt there was still plenty of coating on all the apples.


I am so glad that I purchased a pastry blender as doing this with a fork would have taken forever. 

 There was plenty of crumb topping to generously cover the apples. 
Voila! The end result was bubbling at the edges when I pulled it out of the oven. I let it cool uncovered for about an hour and then covered it until the next morning. The topping did get a little soggy but by removing the lid at work, it crisped up again.

My coworkers raved about it. They warmed up their pieces in the microwave for just about 10 seconds and someone even told me it was like something from a restaurant! I brought home the last bits for my guy to try and his words were "you can make this anytime you want."

So I would say this is an overwhelming win for me in the baking department. And I just happen to have more apples at home that are ready to be baked with :)

Tuesday, February 10, 2015

Valentine's Treats

I just saw on Facebook that today is National Cream Cheese Brownie Day. What food will they think of next to celebrate and give it its own day?  In honor of all things sweet and Valentine's Day coming this weekend, I want to share a few yummy desserts with you.

Oreo Cream Stuffed Brownies
I love a rich, chocolatey brownie and recently I found a recipe on Pinterest for Oreo Cream filled brownies from the Cookies And Cups blog. I made them twice and both times they were a huge hit. I did learn its best to use the recipe for the brownie that she provides on her blog. I tried to use a box mix and the brownies weren't the right consistency. I had to throw away that batch and quickly make another. Her recipe provides enough cream filling to make these as "Double-Stuffed" Oreo cream brownies - how wonderful!


Assembling was a little tricky for me, but I found that if I cut the brownie sheet on half and then the unfrosted half, on half again, I could easily get this on top without it cracking and crumbling apart.

Once assembled, I cut the stuffed brownie into really small pieces because they are rich. I added some crushed candy canes on the plate for a little mint flavor for the holidays.

Homemade Hot Cocoa Sticks
I like to make homemade gifts every year and this year it was hot chocolate on a stick. I used the recipe I found (again) on Pinterest, but I added my own flavors to jazz them up. 

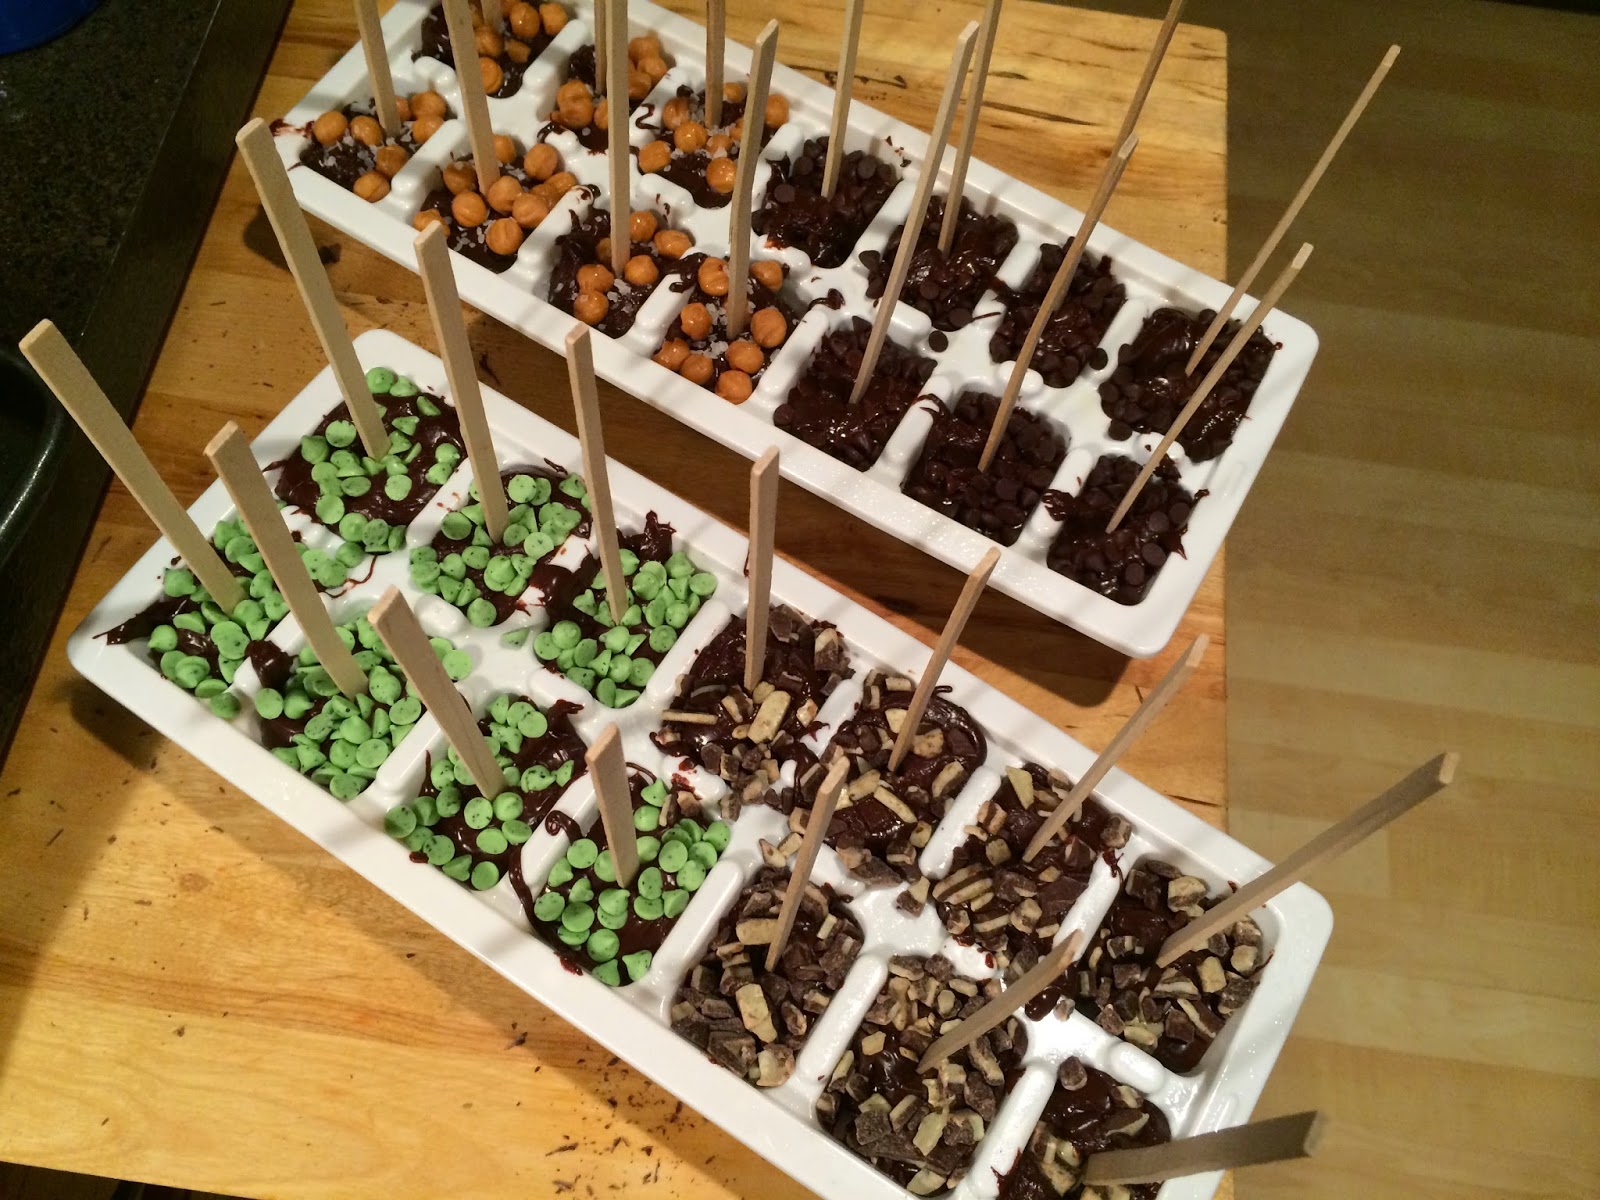
Instead of making them in a pan like the blog suggests, I bought ice cube trays at the dollar store and added a small amount of cooking spray to each cube. This will help the finished cocoa sticks come out of the tray easier.
Your house smells decadent while making these! I used a Tbsp measuring spoon to put the chocolate into each cube on the tray. I chose mini chocolate chips, mint chips, Andes Candies, caramel bits and sea salt. Just sprinkle the toppings over the chocolate and then lightly press them into the chocolate to help it stick. Make sure you do this right away so they don't cool off too much.
Insert a stick into each cube while the chocolate is still soft. I then transferred the trays to the fridge for a few hours to help them solidify quickly .

Run a warmed knife (run under hot water) around the edges of each cube to help it come out easier and then wrap each one in plastic wrap. Then, when you want to use them, unwrap and dip it into a cup of hot milk (or water) and swirl around so it melts and provides you a cup of delicious cocoa.

I gave these to friends and family for the holidays and asked my guy if his daughters enjoyed them. He laughed and said that I never told him he had to share them with his girls and also that they are great enjoyed just as a chocolate fudge treat. He makes me laugh so much. Guess I'll have to make some more so his girls get to try them this time :)

Kruschiki's
Finally, I am sharing with you a family recipe from my mom's side - Kruschiki's (Polish Love Knots). Every Christmas we would make these with my grandma. 
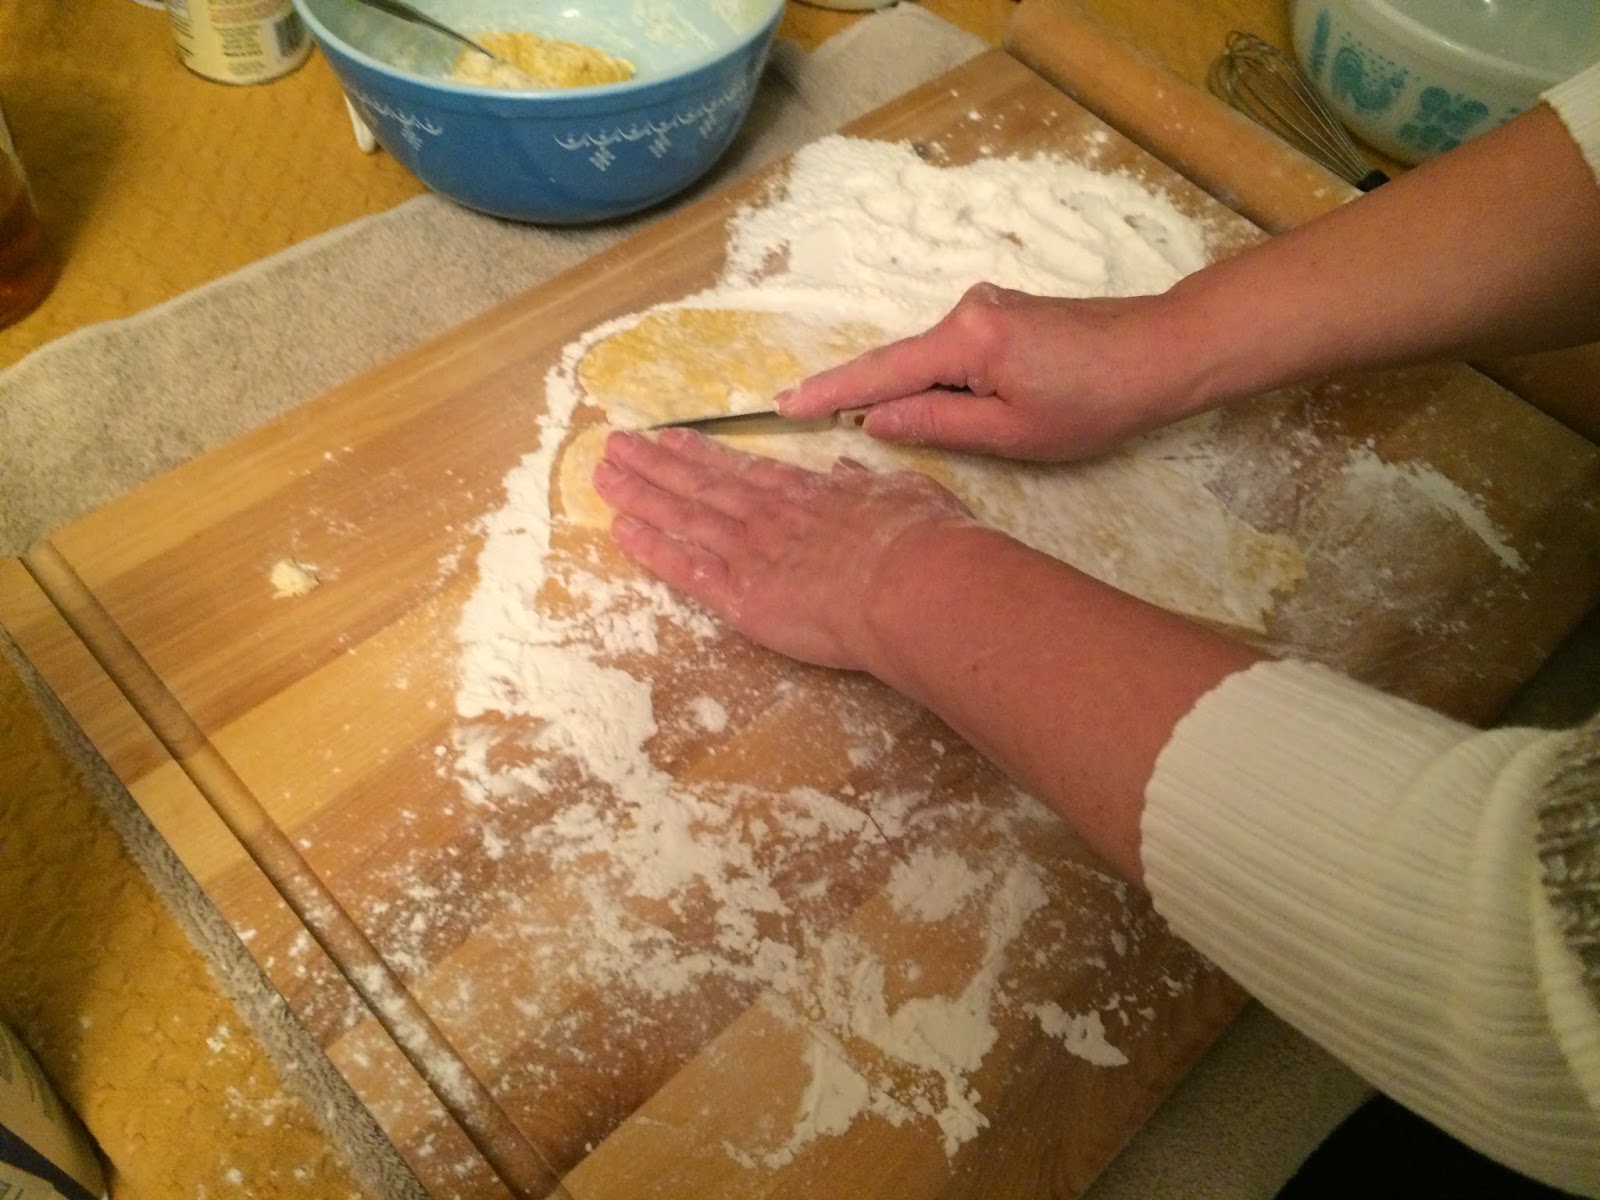
Although they look simple enough to make, the recipe needs to be pretty precise or they end up soggy and not fluffy.
Cutting the dough and flipping the knot can be tricky because it is a delicate dough, but the knot gives it the signature look.

They fry up in a matter of a minute and you have to watch them closely because they will turn brown fast. You want just a light golden color to each side.


I even took a turn at frying them this year. You can't take your eyes off them!

Fresh out of the pan, you can let them cool on paper toweling and let that absorb some of the oil.

A light dusting of powder sugar and the Love Knots are ready to be served. We eat these as Christmas dessert and then again the next morning with our polish sausage and eggs.

Wednesday, December 31, 2014

Easy-Bake Oven???

Growing up, I never had an Easy-Bake Oven. I always helped bake with my mom and grandma  but I did want one. All my friends had them and they looked so fun.

This past weekend, I had the opportunity to use one with my guy's daughters. And let me tell you, I suggest using the word "easy" loosely. Overall it's an easy process to make the food, but the oven itself is another story. And it's really time-consuming for the minimal amount of food you get at the end of the process.

We let each girl pick out one treat to make and although one of the girls picked out a chocolate cake ball treat, the package actually had red velvet mix in it. We improvised and went with it and she was happy it was red with pink frosting! Bonus win!!!

The girls did all the mixing, stirring, and pouring, and even started sneaking bites of the treats before cooking. My guy and I managed the oven because even though it's made for children, it still gets rather hot and adult supervision/assistance is a must!

We learned right away on the first cake that we (as adults) should have read a bit more about the oven. The first cake went in and 16 minutes later, came out raw. We accidentally slid it too far over in the oven and had it in the "cooling area." So back in the oven it went for another 10 minutes until cooked through. Then before the cake could be crumbled into balls, you have to let it cool completely. During this time, we started the second treat.

His other daughter picked brownie sandwiches, which involved mixing up brownie dough and frosting. We had to add a lot more water than the directions stated in order for the dough to form. Then there was flouring the child's hands, rolling the dough in a large ball, then cutting it and forming 12 flat balls with the dough and placing them on the pans. Each ball was about an inch around - such tiny treats!

And here is where we learned another thing about the Easy-Bake Oven. It truly can burn the food. I had issues getting the "muffin" tin to come out of the oven straight and I ended up getting one of the brownies stuck on something inside the oven. It came out with a scrape in it and the next thing I saw was a little smoke coming out of the oven from the food left inside. There is a collection drawer in the bottom, so this must happen from time to time and that's the only access you get to clean it out. The entire oven is sealed with screws, so you are truly at the mercy of the entrance and exit of the oven to see what you are doing. But this makes it very safe for the children to not burn themselves.

Once everything was cooled down, we let the girls add their own frosting and sprinkles to the treats and fingers were the chosen spreading tool. They both did a great job with their treats and we all shared the final product.

I will say that it is a lot of work for the minimal amount of food that you get from the oven. But the girls really loved it and seeing their smiles made it all worth it.

I definitely would like to bake with them in the future, but I'm thinking we make a batch or two of full size cookies that they can help with. You get a lot more treats from a full size recipe with just as many dirty dishes!