Showing posts with label recipe. Show all posts

Thursday, November 14, 2013

Taste of Home Cooking School - Waukesha

I grew up on Taste of Home recipes with my mom and my grandma always reading the magazines and using the cookbooks for great dinner ideas. I have been to their outlet in Greendale village and own quite a few of their cookbooks myself. So when the Taste of Home Cooking School was announced, I didn't want to pass up the opportunity.

I was lucky enough to get some free tickets to the event and even if I couldn't get them, $20 at the door was an OK price for me considering everything that we were given. The recipe knowledge alone was worth more than that!

The Cooking School was held at the Waukesha Expo Center. We entered a littler after 5 pm and received a swag bag and "chair saver" sign - such a smart idea. We found a few seats, put our name on the paper, taped it to the seat, and got in the already growing lines to check out the booths before the cooking began.

Many local vendors were sharing samples of their products and services with us. Unfortunately the rooms were really crowded and I couldn't get my phone out to take pictures.

I was able to try a sample of Red Elephant Chocolate from Milwaukee's 3rd Ward. It literally melted in my mouth and was so delicious. La Coppa Gelato was also there and I tried Pumpkin Gelato that she suggested I pair with the Cinnamon Gelato - it was a wonderful Fall flavor explosion in my mouth.

Simma's Bakery was there with samples of their decadent cheesecake, as well as toffee. I think I might get some of the toffee for the holidays! Weissgerber's was there with some of the options for banquets and the rice pilaf with chicken and asparagus in a white sauce was so yummy. I wanted to go back for more!

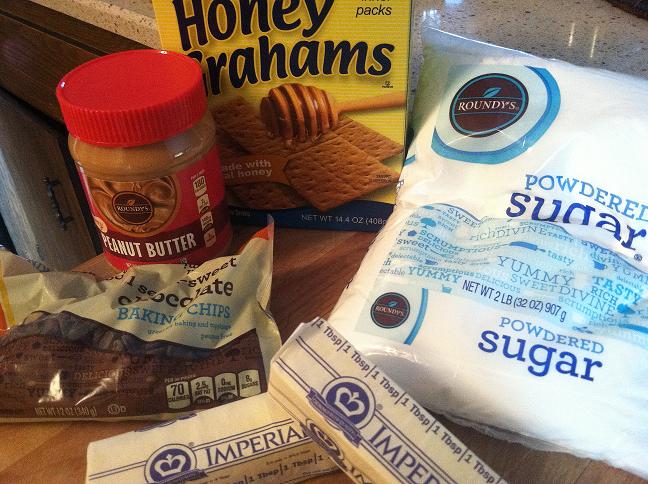
There are so many vendors there that I am not going to be able to name them all but Woodman's supplied us a bag to hold all our goodies as well as coupons, Jif Hazelnut spread, cook books, flyers and more.


The one fatal error that my friend Tiffany and I had was that we didn't look through our bags first and we missed that there was a grand prize giveaway and about a million other giveaways throughout the event. We didn't fill out the cards and thus we weren't eligible for any of the goodies, including Electrolux appliance giveaways from Colder's! Oh well - we still had a blast.

From 7 until about 9 pm we were walked through 10 different Taste of Home recipes by Karen Davis of Taste of Home. These recipes were submitted by Taste of Home readers around the nation. We were provided a Cooking School magazine to take notes in and follow along with the recipe. Taste of Home takes fabulous photos of their finished products. I just hope mine turn out looking that nice.


I had actually made the crescent wreath last year for a holiday party but she even put a twist on it to change it up.

The cooking school was presented on stage with a camera pointing down at the work surface and two jumbo screens provided that video to us. Here are a few shots of the other items in the works.


The tricks of the trade, the fact that complicated recipes seemed so simple to put together, and the beautiful end products made the night completely worthwhile. Taste of Home has the Cooking School program down to an art and I can't wait for the next one to come to the area in maybe spring?

In the meantime, I was told to watch for a day when Taste of Home will offer a lot of their cookbooks for just $5 online. The outlet in Greendale Village is another option if you want to pick up some cooking stuff for the holidays.

Tuesday, October 8, 2013

Adeline's Sweet Pepper Relish

My grandma's friend Adeline (whom we knew as Auntie Adeline) canned everything. And because my mom scored a deal on a bag full of peppers ($2 for all of them!), we decided to make sweet pepper relish.


So we chopped and chopped and chopped some more. And then we cried while cutting onions (chewing orange gum doesn't help btw). But 8 cups of peppers and 3 cups of onions later, we were ready. 


This canning experience was actually quite easy and it took my mom back to the BT days (before teaching, when she had time to can). 

Combine everything, bring to boil and fill up the jars. Make sure the seal is clean, plop on the lid and put on the ring. 


Because it was so hot, we didn't have to use the water bath and just are waiting for the clicks of the kids to start happening. 

Adeline's Sweet Pepper Relish
8 cups coursely chopped peppers
3 cups chopped onion
3 cups sugar
3 cups vinegar
2 T salt (uniodized)
2 T mustard seed
1 tsp. celery seed (optional)

Combine all and bring to a boil. Simmer uncovered 5 minutes. Pour into jars and seal at once. Makes approx. 5 pints.

Monday, September 23, 2013

Move It Monday: Egg Muffins

I have been looking for healthier breakfast options as I am starting to get bored with yogurt and granola. I don't want to burn out on it and a warm breakfast on a cooler morning is always a good option to keep me warm in my freezing office.

And I'm starting my morning workouts again - my cousin and I have a bet of loser buys Starbucks on the line. #PSL for her #Chaitea for me! Today I got up and did a quick workout of crunches, lunges, squats, leg lifts, planks and pushups. I'm feeling great!

I have had this recipe on my Pinterest breakfast page for quite sometime and I used it as inspiration for my own mini crust-less quiches.


 Separating the eggs was a bit difficult as the white was really stuck to my eggs.
 I used fresh broccoli florets and stems that I steeped for just 5 minutes.
I had Aldi's brand of light Swiss cheese wedges and decided to chop up a few of those and keep the cheese light on the inside. (Note: wet the knife when cutting the wedges to make chopping easier.)
 Then you combine it all together and stir.
I didn't stir the egg whites in well enough in the beginning and had to strain them out and start over. It was a little messy, but this helped to have consistent egg muffins.
 
 At the last minute, I added some pre-cooked bacon for a little more flavor.
 And 30ish minutes later, I had beautiful egg cups.

Healthy Mini Crust-Less Quiches
4 whole eggs
2 egg whites
3 wedges light Swiss cheese, chopped (like Laughing Cow or Happy Farms)
2 cups broccoli florets and stems, chopped and steeped for 5 minutes
1/4 cup milk
salt & pepper to taste
2 pieces pre-cooked bacon, sliced into 12 pieces


Preheat oven to 375 degrees. Spray with non-stick spray 12 muffin tins. Mix eggs and white together thoroughly in a medium sized bowl. Add broccoli, milk, cheese salt and pepper and stir to combine.  Spoon into 12 muffin tins filling each cup 3/4 full - no fuller. Add 1 piece of bacon onto the top of each cup. Cook for 25-30 minutes, or until egg is browned on top and is solid.

Let cool. These will last up to a week in the fridge in a tightly sealed container.

I take two to work with me and warm them in the microwave for about 20 seconds.

My mom thought of taking one to work with her and mashing it between an English muffin for an egg sandwich and make it a little more filling. I might have to try that with my next batch.

Tuesday, March 19, 2013

Pin-It Tuesday: Mock Reese's Peanut Butter Cups

I cannot quite explain my obsession with Reese's Peanut Butter Cups, especially the holiday shaped ones. Trees, hearts, eggs, pumpkins -I love them all! The sweet and salty combination is my kryptonite. I have an extremely hard time resisting, but I try with all my willpower.

But when I found this recipe on Pinterest to make them at home, I just had to give it a whirl.
The ingredients are simple enough that I had everything already at home!

I had to mash up some graham crackers and it ended up being a bit more than one of the three packages in the box.

All dry ingredients are mixed together.


Although I had a little issue measuring the powdered sugar - whoops! Mom loves when I make a mess in her kitchen :)


Then the wet and dry ingredients are combined into the heavenly peanut butter filling!


Then you have to spread it into a pan and let it set up in the freezer for a bit before putting the chocolate over the top.


Here is where my fail came in. Who would have known that 20 seconds too long in the microwave can destroy chocolate? (I do now!)


My mom came and saved the day, but Matt stopped by and distracted me so I didn't get the final picture. Yes he laughed at me and my chocolate debacle but couldn't wait to try the final product. I took some over to his place the night we had the pulled pork burritos.

They are a pretty good mock version of them and now I know just how bad they are for me. However making them myself means that I can cut them as small as I need for a PB/Chocolate fix. Matt loved them and ate a few after the burritos and had the rest that I left him in the next few days.

This will definitely go on my repertoire of amazing desserts that need to be rationed! :) Or sold at a bake sale!

Thursday, November 29, 2012

From the Books Thursday: Shrimp w/ Snow Peas

We sure do like our Taste of Home cookbooks in this house, and today's recipe comes from the 2003 Light & Tasty book. We had some shrimp to use up in the freezer and the Shrimp w/ Snow Peas recipe sounded the best.


I gathered all the ingredients that I needed and any extras I could think of. We had an entire package of sliced mushrooms, but they were put too far back in the fridge and froze :(  So we had to use the brand new package and chop them up ourselves. No biggie, but sad we had to toss the rest out.


Mom took on the job of peeling the shrimp. They were deveined and not too hard to peel, but I'm not a fan of peeling the shrimp. I had already cut a fingertip earlier in the week by reaching in a drawer blind and catching a serrated knife, I didn't need a shrimp tail to cut that back open.
While she was doing that, I grabbed the lemon, dill and other ingredients and mixed away. Don't be shocked by the amount of lemon as it's nice and mellow in the final dish.
Chop, chop, chop the veggies I did!
Mom took care of the sweating of the veggies

I interrupted with photos of us - sheesh that kitchen light is bright!
And then I took it upon myself to open that bag from photo one and cook with wine. This one was just ok - it had a little musty smell once I let it breathe. But it had a screw cap so I'm not sure where the musty came from. I guess you get what you pay for as it was well under $10.

Here is me supervising while the veggies sweated out.

After about 10 minutes, it was time to add the snow peas and for added yum, edamame! I was so excited to use some of these. A coworker turned me onto edamame years ago at a holiday party and I have been addicted ever since.
I gave my lemon-dill sauce a stir and added it to the veggies and it immediately thickened. About two more minutes on the stove and we were set to eat. This meal takes the length of time to cook rice on the stove, so our timing was impeccable. (However, we did have two people cooking this one!)

This was a very refreshing and healthy stir-fry dish that surprisingly doesn't use soy sauce. At only 322 calories, 6 g fat and 4 g fiber per HUGE serving (including the rice), this is going to become a regular in the family repertoire.
After dinner, I put on my comfy holiday socks with workout capris and relaxed on the couch before a Barre3 video was in order. I know how to keep it classy! :) This is just the first of my many pairs of holiday socks!

Thursday, November 1, 2012

From The Books Thursday: Hungry Girl Hummus

My mom and I have become HUGE fans of hummus this summer, but had never made our own.  I first had hummus many years ago without really knowing what it was, just a yummy dip for celery. Then I had it again at Casablanca (cool place) in Milwaukee for my friend Joe's birthday two years ago. Ever since then, I occasionally would get cravings for it, but was too lazy to do anything about it. I found a recipe on Pinterest to make a layered Greek dip with a hummus base and I created it for a friend's Labor Day party.

That layered dip can be found here. I didn't make my own hummus, just bought that from the store because I was having a hard time finding tahini and sesame seed oil. (And I was crunched on time.) But this is the dip that my mom tried and absolutely loved. She started to make herself miniature hummus dips to take to work for lunch.

My first Foodie Pen Pal package had single servings of hummus in it, and I'm hoping some store in the Milwaukee area carries these - no luck so far. They are perfect little packs that you just squeeze and the hummus pipes itself onto your veggies or pita chips.

I recently found a recipe for Artichoke Hummus in my Hungry Girl 200 Under 200 cookbook and thought I would give it a try. I love Lisa Lillien - she transforms regular meals into low calorie versions without sacrificing flavor at all. She has numerous books, a TV show, daily emails, and appearances, yet she continues to create new recipes in the Hungry Girl kitchen everyday.

Look at all those tabs on the top of recipes to try! 
This time I was making it completely from scratch. I only had to buy the Greek yogurt and artichoke hearts as I had everything else in the house and it didn't call for Tahini or sesame seed oil. (PS - found out that tahini is located by the peanut butter - so now I know!)

Apparently, my mom has an obsession with Garbanzo beans (or we have thought to make hummus in the past and forgot) because we had four cans on the shelf. We never have 4 cans of anything on the shelf in our hosue!  The cuke and green pepper are my additions to make it a layered dip.

I started to put everything in the blender, but took a break to mash the garbanzo beans. This was a lot harder than I thought it was going to be. Definitely use sturdy tools to mash!

Then it's everything in the blender and BLEND AWAY!
We taste tested this hummus compared to the store bought we had in the fridge, and we both preferred the homemade. Sure it wasn't a complete apples to apples comparison (or should I say chickpea to chickpea), but we really liked the tartness of the homemade. I did add a little dill to the hummus for added flavor. Lisa Lillien, you have another successful recipe!
Then I chopped up 1/2 the cucumber, 1/3 the green pepper, 10 kalamata olives and then sprinkled feta cheese and a little more dried dill to make the beautiful creations below.


This makes technically 8 servings but at 56 calories a serving, I doubled our portions for lunch and took some pita chips. Count in the veggies and cheese and this is a nutritious and very delicious, yet simple lunch!